User interface
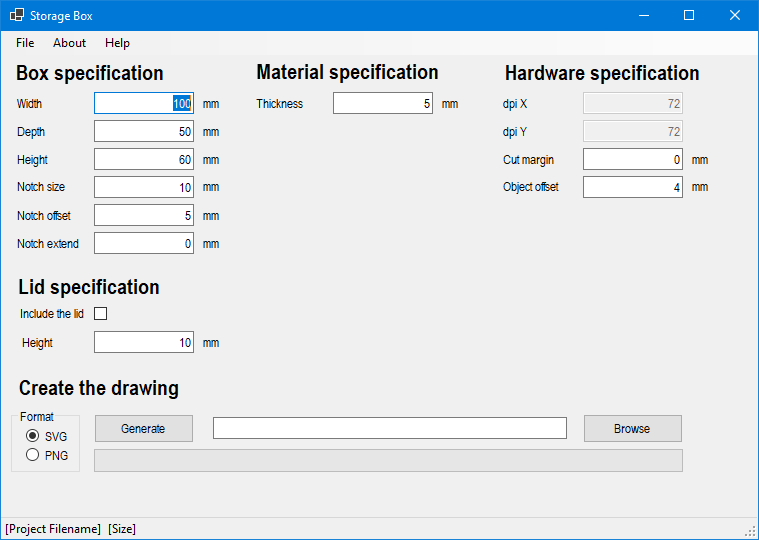
The picture below shows the main window of the tool.The items listed in the Box specification, Material specification, Hardware specification and Lid specification are described in detail on other pages.
Button "Generate"
Step 1:
The Generate button first checks if the intput values make sense. It is still possible to create settings which result in drawings which would not result in a box. A drawing is generated to help in understanding how to change the settigns to create correct drawings.
Step 2:
The output diagram is created and saved.
If the output filename is not yet known, the tool will ask you to provide a name.
Below the generate button a progress bar shows the progress, when fully green the file is created.
Menu: File
Using this menu you can save the settigns to a filename for later reference, e.g. if you want to use the same settings again.
This menu contains a load option to load an earlier saved settings file.
The saved settings file is in JSON format.
Status Bar
In the Status Bar at the bottom of the window you can find infomation about the project filename and overall size of the combined drawings including the object offsets between the drawings. This indicates the material you need if you print it in one go.

